How to Wash a Car the Right Way (Step-by-Step Guide)
Washing your car seems simple — until you notice swirl marks, water spots, and dull paint that weren’t there before. On a $35,000 vehicle, the damage caused by repeated incorrect washing can require hundreds of dollars in professional paint correction to fix. Understanding exactly how to wash a car the right way — and the mistakes that silently destroy your paint — is one of the most practical things any car owner can know before picking up a sponge. This guide covers every method: hand washing at home, using a self-service bay, and going through an automatic car wash, with step-by-step instructions, a full supplies breakdown, and specific techniques drawn from professional detailers.
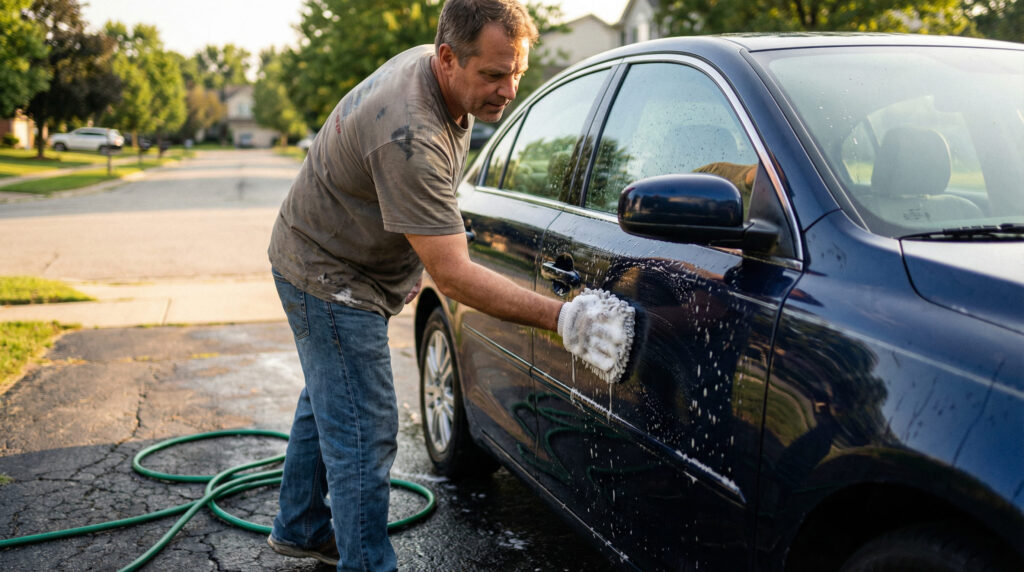
Table of Contents
The most important fact about washing a car correctly: The two-bucket method — one bucket of soapy water, one of clean rinse water — is the single biggest thing separating a scratch-free wash from one that slowly degrades your clear coat. Every other technique builds on this foundation.
The Most Important Fact About Washing Your Car
Most car washing damage isn’t caused by the car wash itself — it’s caused by technique. Using a single bucket, washing in circular motions, or letting the car air dry in the sun are all habits that create cumulative paint damage visible as swirl marks and water spots under direct light.
How to wash a car — the short version: Rinse the car top to bottom to remove loose dirt, clean the wheels first, wash the body panel by panel using the two-bucket method with a microfiber mitt, rinse again from top to bottom, then dry immediately with a clean plush microfiber towel. Always work in the shade. The complete process takes 30–45 minutes.
New vs. used cars: The washing technique is identical regardless of vehicle age or condition. Older paint with existing imperfections is actually more vulnerable to additional marring — meaning proper technique matters more, not less, on a used vehicle.
Home washing vs. car wash: Hand washing at home done correctly is always superior for long-term paint condition. You control every variable — pressure, contact, products, and drying. Touchless automatic car washes are the next safest option. Automatic brush-tunnel car washes are the worst for paint health and should be avoided entirely if paint condition matters to you.
What You Need Before You Start — Supplies Guide
Using the wrong tools is the primary cause of wash-induced scratches. You do not need to spend a lot — but you do need the right items. The table below covers everything from the absolute essentials to the professional upgrades worth considering.
| Supply | Why You Need It | Priority |
|---|---|---|
| Two 5-gallon buckets | One for soapy water, one for rinsing your mitt — the foundation of scratch-free washing | Must Have |
| Car wash soap | pH-balanced formula that cleans without stripping wax or damaging paint. Never substitute dish soap. | Must Have |
| Microfiber wash mitt | Holds suds safely and won’t drag contaminants across the paint the way a sponge does | Must Have |
| Microfiber drying towels (2+) | Absorbs water without scratching. Never use bath towels, chamois, or paper towels. | Must Have |
| Hose with adjustable nozzle | A steady flow rinse is gentler on paint than a pressure washer held at close range | Must Have |
| Wheel cleaner + wheel brush | Brake dust is acidic. A dedicated cleaner and stiff brush removes it safely without damaging alloy finishes. | Must Have |
| Grit guards (one per bucket) | Sit at the bottom of each bucket — dirt sinks below them so you don’t pick it back up with your mitt | Pro Upgrade |
| Foam cannon or snow foam lance | Pre-soak that loosens surface dirt before contact. Reduces scratch risk significantly. | Pro Upgrade |
| Detailing spray / quick detailer | Sprayed onto panels before drying — adds lubrication so the towel glides without dragging | Optional |
| Tire shine applicator | Finishing touch that restores the deep black look of tire sidewalls | Optional |
Never use these on your car’s paint: dish soap, laundry detergent, household all-purpose cleaners, or abrasive sponges. These strip your wax protection and can permanently etch clear coat with repeated use.
How to Wash a Car at Home — Step by Step
Follow this sequence in order. The order matters — washing wheels last contaminates clean paint, and drying before a final rinse bakes soap residue onto the surface. Each step below includes the reasoning behind it so you understand not just what to do, but why.
Step 1 — Pick the right time and place. Park in full shade or wash during early morning or late afternoon. A hot car hood in direct sunlight dries soap and water in seconds, leaving permanent water spots and residue. Run your hand across the hood — if the surface is uncomfortable to touch, let it cool in shade for 10 minutes before you begin.
Step 2 — Set up your two buckets. Fill bucket #1 with car wash soap and water at the manufacturer’s recommended ratio (typically 2–3 oz per gallon). Fill bucket #2 with plain clean water only. Drop a grit guard into the bottom of each bucket. This two-bucket system is the single most impactful thing you can do to wash your car without scratching it.
Step 3 — Pre-rinse the entire car from top to bottom. Using your hose at medium pressure, rinse from the roof downward across every panel and into the door gaps. This removes loose surface dirt, bird droppings, and debris before anything touches the paint. Avoid pointing the nozzle directly at rubber seals or the antenna base at high pressure.
Step 4 — Clean the wheels first. Spray dedicated wheel cleaner on all four wheels and let it dwell for 60 seconds — do not let it dry on the surface. Scrub the face, barrels, and wheel wells with a dedicated wheel brush, then rinse each wheel completely before moving on. Do this before touching the car’s body, because wheel cleaner and brake dust splatter during scrubbing and will contaminate freshly washed panels if you do it in the wrong order.
Step 5 — Wash the body one panel at a time, top to bottom. Load your wash mitt with suds from bucket #1. Starting at the roof, wash in straight lines — never circles. After completing each panel, dunk the mitt into bucket #2 to release trapped dirt, wring it out, reload with fresh soap, and move to the next panel. Work in this order: roof → hood → trunk lid → upper doors → lower doors → front and rear bumpers. The lower 12 inches of the car accumulate the most road contamination — always save them for last.
Step 6 — Final rinse, nozzle removed. Rinse the full car from top to bottom. For the final pass, remove the nozzle from your hose entirely and let water sheet freely off the paint surface. This sheeting action minimizes the droplets that sit on the surface and cause water spots — you want water flowing off in sheets, not beading in isolated drops.
Step 7 — Dry immediately. Spray a quick detailer onto one panel at a time as a lubricant before wiping. Use a large plush microfiber drying towel in a gentle patting-and-gliding motion — do not press hard or scrub. Use one towel for the painted body and a separate towel for door jambs, the trunk sill, and under the hood. Work fast — you do not want water to air-dry on the surface at any point.
Step 8 — Finishing touches. Apply tire dressing to each tire sidewall using a foam applicator pad. If you plan to apply wax, paint sealant, or a ceramic spray coating, now is the ideal moment — the paint is perfectly clean and ready to bond with any protective layer you apply.
Pro tip — the touchless pre-soak: If you have a foam cannon or even a garden pump sprayer, cover the car in diluted car wash soap and let it sit for 3–5 minutes before you touch it. This loosens the bulk of surface contamination chemically before your mitt makes any contact, dramatically reducing the risk of scratching.
How to Wash a Car at the Car Wash
Not everyone has the time, space, or water access to wash at home. Understanding which types of car washes are safe — and which ones cause invisible damage — can protect your paint even when you rely on commercial facilities.
| Car Wash Type | Paint Safe? | Clean Result | Avg. Cost | Verdict |
|---|---|---|---|---|
| Hand wash at home | Yes — full control | Excellent | $2–5 | Best option overall |
| Touchless automatic | Yes — no contact | Good | $10–20 | Safe, but misses dirt in crevices |
| Self-service bay | Mostly — depends on technique | Good | $3–8 | Good if you bring your own mitt |
| Automatic brush tunnel | No — brushes cause swirl marks | OK | $8–15 | Avoid if paint condition matters |
| Professional detailer | Yes — professional technique | Excellent | $50–150+ | Best result, ideal for periodic deep cleaning |
At a self-service car wash bay: Start with the high-pressure rinse setting to remove loose surface dirt before applying soap. Use the foam brush setting with a light touch — let the soap do the work, not pressure. Bring your own microfiber mitt if possible, because public foam brushes are frequently contaminated with dirt from previous users. Always end with the spot-free rinse option if available, which uses purified water that won’t leave mineral deposits. Bring a microfiber drying towel and dry the car before leaving the bay.
Why to avoid automatic brush car washes: Rotating fabric and foam brushes in automatic tunnels accumulate abrasive grit from every vehicle they touch. That contamination gets dragged across your clear coat at speed, leaving micro-scratches that are individually invisible but accumulate into the swirl marks and hazy finish visible under direct sunlight. Even soft-cloth washes create this damage over time. The convenience is not worth the cumulative paint deterioration.
7 Car Washing Mistakes That Damage Your Paint
These mistakes are so common that even experienced car owners make them regularly. Every one causes real, cumulative damage that compounds over years of washing.
Mistake #1 — Washing in direct sunlight. Heat causes soap and water to evaporate before you can rinse them off, baking residue and mineral deposits onto the clear coat. The resulting water spots and streaks require polishing — not rewashing — to remove.
Mistake #2 — Using one bucket. Dunking a contaminated mitt back into your soap bucket reapplies dirt directly to the paint on the next pass. This is the primary cause of wash-induced swirl marks in home washing.
Mistake #3 — Washing in circular motions. Circular scrubbing distributes micro-scratches in a spiral pattern that catches light from every angle, creating the hazy swirl effect visible on dark-colored vehicles in direct sunlight. Always wash in straight, linear strokes.
Mistake #4 — Using dish soap. Dish soap strips your wax or sealant in a single wash, leaving the clear coat unprotected. With repeated use, it also dries out rubber trim and window seals. The $10 you save on car wash soap costs far more in accelerated paint deterioration.
Mistake #5 — Letting the car air dry. Tap water contains dissolved minerals. When water evaporates on a painted surface, it deposits calcium and silicate particles that bond with and etch into the clear coat — the white, chalky spots you see on darker vehicles after rain or washing.
Mistake #6 — Using a bath towel or paper towel. Even soft bath towels are abrasive enough on clear coat to cause fine scratches. Paper towels are wood pulp — essentially sandpaper at the microscopic level. Only dedicated automotive-grade plush microfiber towels should touch your paint.
Mistake #7 — Washing the wheels last. Wheel cleaner contains acids that dissolve brake dust. If it splashes onto freshly washed painted panels and is allowed to dry, it can etch the clear coat and requires you to rewash the affected areas. Always clean wheels before touching the body.
Pro Detailer Tips Most Guides Won’t Tell You
These are the techniques that separate a basic wash from one that genuinely maintains your vehicle’s paint condition over years of ownership.
Use two mitts — one for the top half, one for the lower half. The lower 12 inches of your car accumulate tar, brake dust, and road grit that the upper panels never encounter. Professional detailers use a clearly marked dedicated mitt for the lower panels only, so that contamination from the rockers and bumpers never reaches the cleaner upper surfaces.
Temperature matters more than most people realize. Cold paint is fine to wash at any temperature above freezing. Hot paint — a hood surface above approximately 85°F — causes soap to bond differently and increases spotting and streaking risk even with correct technique. If the car’s surface is uncomfortably warm to touch, let it cool in shade before starting.
Decontaminate with a clay bar twice a year. Washing removes surface dirt. It does not remove bonded contaminants — industrial fallout, rail dust, embedded brake particles — that grip the clear coat and create the rough texture you feel when running your hand over the paint. A clay bar treatment removes these bonded particles. After claying, paint feels as smooth as glass and is fully prepared for wax or sealant application.
Protect immediately after washing. A clean car is the ideal surface for wax, paint sealant, or ceramic spray coating. Skipping this step means the next layer of contamination bonds more aggressively to unprotected clear coat. A spray wax applied while the car is still slightly damp adds months of protection against water spots, UV degradation, and road contamination.
If you drop the mitt, do not reuse it without rinsing. A single drop on asphalt embeds enough abrasive grit to scratch a full body panel. Rinse the mitt thoroughly under running water before using it again — or switch to a backup mitt.
This might interest you: Car Wash Guide — Products, Techniques & Expert Advice at Carqly
Frequently Asked Questions About Washing a Car
What is the best way to wash a car without scratching it?
The two-bucket method is the single most effective technique for scratch-free washing: one bucket with car wash soap, one with clean rinse water. After washing each panel, rinse the mitt in the clean-water bucket before reloading with soap. Always wash in straight lines — never circles. Use a microfiber wash mitt rather than a sponge, and work top to bottom so contamination from lower panels never reaches cleaner upper surfaces.
What can I use to wash my car if I don’t have car wash soap?
In a genuine emergency, a very small amount of dish soap — no more than half a teaspoon per full bucket — will clean the car without immediately damaging paint. However, dish soap strips your wax or sealant in a single wash and dries out rubber trim and seals with repeated use. A dedicated car wash soap costs $8–15 and lasts months — it is always the correct choice for regular washing.
How to wash a car at the car wash without damage?
Choose a touchless car wash or self-service bay rather than any wash with rotating brushes or fabric cloth. At a self-service bay, start with the high-pressure rinse, then use the foam setting, and finish with the spot-free rinse. Bring your own microfiber drying towel — the air dryers at most car washes leave more water than they remove. Avoid any automatic tunnel wash with spinning foam or cloth brushes entirely if long-term paint condition matters to you.
How often should I wash my car?
Every two weeks is the standard recommendation for normal driving conditions. Wash weekly if you drive near the coast where salt air accelerates corrosion, park under trees where bird droppings and tree sap cause chemical etching, or drive on winter roads treated with salt or brine. Contaminants sitting on paint do not just accumulate — they actively etch into clear coat the longer they are left untreated.
Can I wash my car in direct sunlight?
No. Washing in direct sunlight causes soap and water to evaporate before you can rinse them off, baking mineral deposits and soap residue onto the clear coat. The resulting water spots and streaks cannot be removed by washing — they require polishing or paint correction. Always wash in the shade, or in the early morning or late afternoon when ambient temperature and surface heat are lower.
How much does it cost to wash a car?
Washing at home costs $2–5 per wash once you have the supplies. A basic drive-through car wash costs $10–20. A full-service professional wash or express detail runs $20–50. A full professional detail ranges from $100 to $300 or more depending on the vehicle size and service level. Home washing is the most cost-effective option by a significant margin for regular maintenance washing.
Is it better to wash your car by hand or use an automatic car wash?
Hand washing at home — done correctly with the two-bucket method and proper microfiber tools — is always better for long-term paint condition. You control every variable. Touchless automatic car washes are the next safest option when time or facilities are a constraint. Automatic brush-tunnel washes are the worst option for paint health — they look clean from a distance but leave cumulative micro-scratching that shows as swirl marks under direct light.
How long does it take to wash a car at home?
A complete home wash using the two-bucket method takes 30–45 minutes for most standard vehicles. This includes 5 minutes for setup, 5 minutes for pre-rinse and wheel cleaning, 15–20 minutes for washing the body, 5 minutes for the final rinse, and 5–10 minutes for drying. Adding a spray wax application adds another 10 minutes. Professional-level results at home require this time investment — shortcuts are where the damage happens.
Conclusion
Washing a car correctly is not complicated — but the specific habits you use on every single wash determine whether your paint looks better or worse five years from now. The states of washing that matter most are: the two-bucket method, microfiber tools throughout, washing in the shade, working top to bottom, and drying immediately before any water spot can form. These five principles eliminate the vast majority of wash-induced paint damage.
For automatic car washes, touchless is always safer than any brush-based system. For home washing, a proper two-bucket setup with quality soap and microfiber tools costs less than a single professional detail appointment and pays for itself in preserved paint condition within the first few months. Wash every two weeks, protect with a spray wax after each wash, and clay bar the paint twice a year — and your car’s finish will outlast what most owners experience by years.